Authentication and Permissions
Google OAuth
Instant supports logging users in with their Google account. There are a few ways to do this: it depends on whether you are building for web or React Native.
Choose the option that sounds best to you, and the rest of the document will show you how to add Sign in with Google to your app.
Building for Web?
Building for React Native?
#Overview
There are three main steps:
- Google Console: Set up your consent screen and create an Oauth client.
- Instant Dashboard: Connect your Oauth client to Instant
- Your app: Add some code to log in with Google!
Let's dive deeper in each step:
#1. Set up your consent screen and create an Oauth client
Head on over to Google Console. You should be in the "Credentials" section.
Configure your Google OAuth consent screen
- Click "CONFIGURE CONSENT SCREEN." If you already have a consent screen, you can skip to the next step.
- Select "External" and click "CREATE".
- Add your app's name, a support email, and developer contact information. Click "Save and continue".
- No need to add scopes or test users. Click "Save and continue" for the next screens. Until you reach the "Summary" screen, click "Back to dashboard".
Create an OAuth client for Google
- From Google Console, click "+ CREATE CREDENTIALS"
- Select "OAuth client ID"
- Select "Web application" as the application type.
- Add
https://api.instantdb.com/runtime/oauth/callbackas an Authorized redirect URI.
- If you're testing from localhost, add both
http://localhostandhttp://localhost:3000to "Authorized JavaScript origins", replacing3000with the port you use. - For production, add your website's domain.
And with that you have your Oauth client!
Save your Client ID and your Client Secret -- you'll need it for the next step!
#2. Connect your Oauth client to Instant
Go to the Instant dashboard and select the Auth tab for your app.
Add your Oauth Client on Instant
- Click "Set up Google"
- Enter your "Client ID"
- Enter your "Client Secret"
- Check "I added the redirect to Google" (make sure you actually did this!)
- Click "Add Client"
And voila, you are connected!
#3. Add some code!
Method: Expo Web Auth
Instant comes with support for Expo's AuthSession library. To use it, you need to:
- Set up AuthSession
- Register your app with Instant
- Use AuthSession to log in with Google!
Let's do that.
Set up AuthSession
If you haven't already, follow the AuthSession installation instructions from the Expo docs.
Next, add the following dependencies:
npx expo install expo-auth-session expo-crypto
Update your app.json with your scheme:
{"expo": {"scheme": "mycoolredirect"}}
Register your app with Instant
Now that you have you App Scheme, it's time to tell Instant about it.
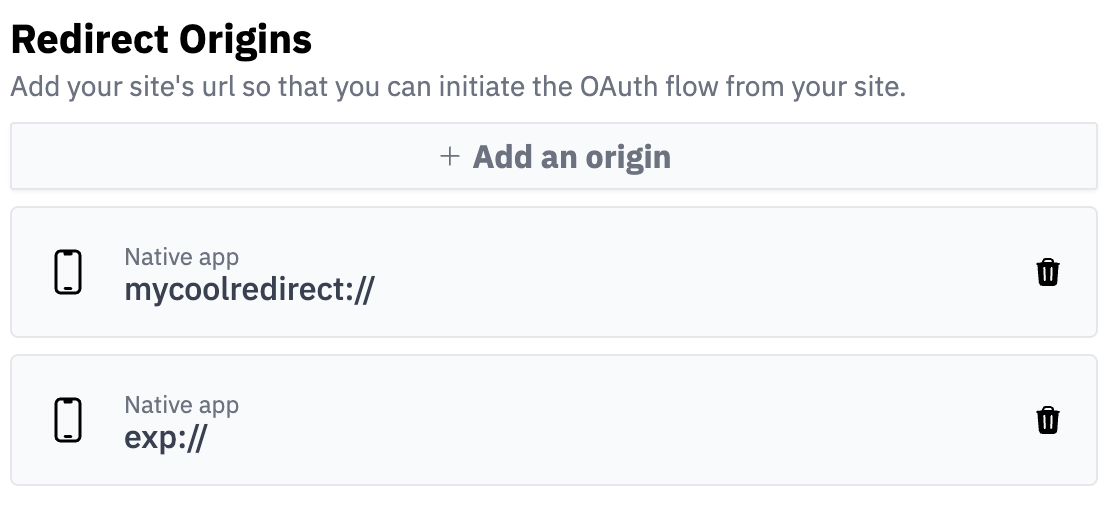
From the Auth tab on the Instant dashboard, add a redirect origin of type "App scheme". For development with expo add exp:// and your scheme, e.g. mycoolredirect://.
Use AuthSession to log in with Google!
And from here you're ready to add a login button to your expo app! Here's a full example
import { View, Text, Button, StyleSheet } from 'react-native';import { init } from '@instantdb/react-native';import {makeRedirectUri,useAuthRequest,useAutoDiscovery,} from 'expo-auth-session';const APP_ID = '__APP_ID__';const db = init({ appId: APP_ID });function App() {return (<><db.SignedIn><UserInfo /></db.SignedIn><db.SignedOut><Login /></db.SignedOut></>);}function UserInfo() {const user = db.useUser();return <Text>Hello {user.email}!</Text>;}function Login() {const discovery = useAutoDiscovery(db.auth.issuerURI());const [request, _response, promptAsync] = useAuthRequest({// The unique name you gave the OAuth client when you// registered it on the Instant dashboardclientId: 'YOUR_INSTANT_AUTH_CLIENT_NAME',redirectUri: makeRedirectUri(),},discovery,);return (<Buttontitle="Log in"disabled={!request}onPress={async () => {try {const res = await promptAsync();if (res.type === 'error') {alert(res.error || 'Something went wrong');}if (res.type === 'success') {await db.auth.exchangeOAuthCode({code: res.params.code,codeVerifier: request.codeVerifier,}).catch((e) => alert(e.body?.message || 'Something went wrong'));} else {}} catch (e) {console.error(e);}}}></Button>);}const styles = StyleSheet.create({container: {flex: 1,justifyContent: 'center',alignItems: 'center',},});export default App;